How to Measure a Driveway or Patio Job from a Site Plan
A driveway or patio quote usually starts with a site plan, a boundary sketch, or a photo of a hand-drawn layout with a few dimensions scribbled on it. Getting from that to a materials list means more than one area figure — you need surface area, sub-base volume and edging length as separate quantities. Here's a straightforward way to take all three off the same drawing without a tape measure and a calculator on-site.
1. Get the drawing into a measuring tool
Whatever the source — a site plan from the client, a photo of a boundary sketch, or a scanned block plan — you need it on screen at a size you can click on accurately. A tool that opens the file directly in the browser (like MyTakeoff) means you're not exporting to a desktop app or redrawing the boundary from scratch.
2. Calibrate the scale before measuring anything
Find a dimension on the drawing you already know for certain — a building frontage, a boundary length marked on the plan, or a stated scale bar. Click the two ends of that known distance and enter the real-world measurement. Every measurement you take after that is calculated from this calibration, so it's worth picking a dimension you're confident in rather than a scale ruler held against a photo. More on why this matters more than the drawing's stated scale in How to Read a Scale Drawing Without Site Software.
3. Measure by item, not by one big area
A driveway or patio job is rarely just "one area of paving" once you price it properly. Break it down into the items you're actually ordering materials for - area, volume and linear takeoffs, each covered in Linear, Area, Volume and Count Takeoffs Explained:
- Surface area — the tarmac, block paving or concrete finish, traced as an area measurement in m²
- Sub-base volume — the same footprint, but as a volume measurement with a depth entered: typically 100–150mm of MOT Type 1 for a patio, 150–200mm for a domestic driveway (more on poor ground or for a driveway that'll take heavier vehicles). Measuring this as volume rather than area avoids doing the depth multiplication by hand every time the boundary changes.
- Edging and kerbs — linear runs along every edge that needs an edging course, block kerb or drainage channel
- Gullies, manhole covers and inspection chambers — counted individually, since they're priced per item rather than by area
4. Keep a personal item library
If "MOT Type 1 sub-base", "block paving" and "edging course" are items you're pricing on every job, naming them consistently and letting the tool remember them (name, unit type, and a colour) means each repeat job measures faster than the last, and your export always groups the same item under the same name.
5. Export and double-check against the marked-up drawing
Once everything's measured, export a spreadsheet of quantities for your quote, and a marked-up copy of the drawing showing every area, volume and edging run. Checking the two against each other before you send a price out catches the "did I include the sub-base under that section too" mistakes that are easy to make on an irregular plot. It's also worth adding a waste allowance on top of the raw figures — commonly around 10% for aggregate, concrete or block paving, more on a plot with a lot of cutting in.
It also doubles as something to send your own client. A homeowner can't check your maths on a spreadsheet, but they can look at a marked-up drawing and see what's been allowed for — sending it alongside the quote turns "trust me, that's the price" into something they can actually see for themselves.
A real example
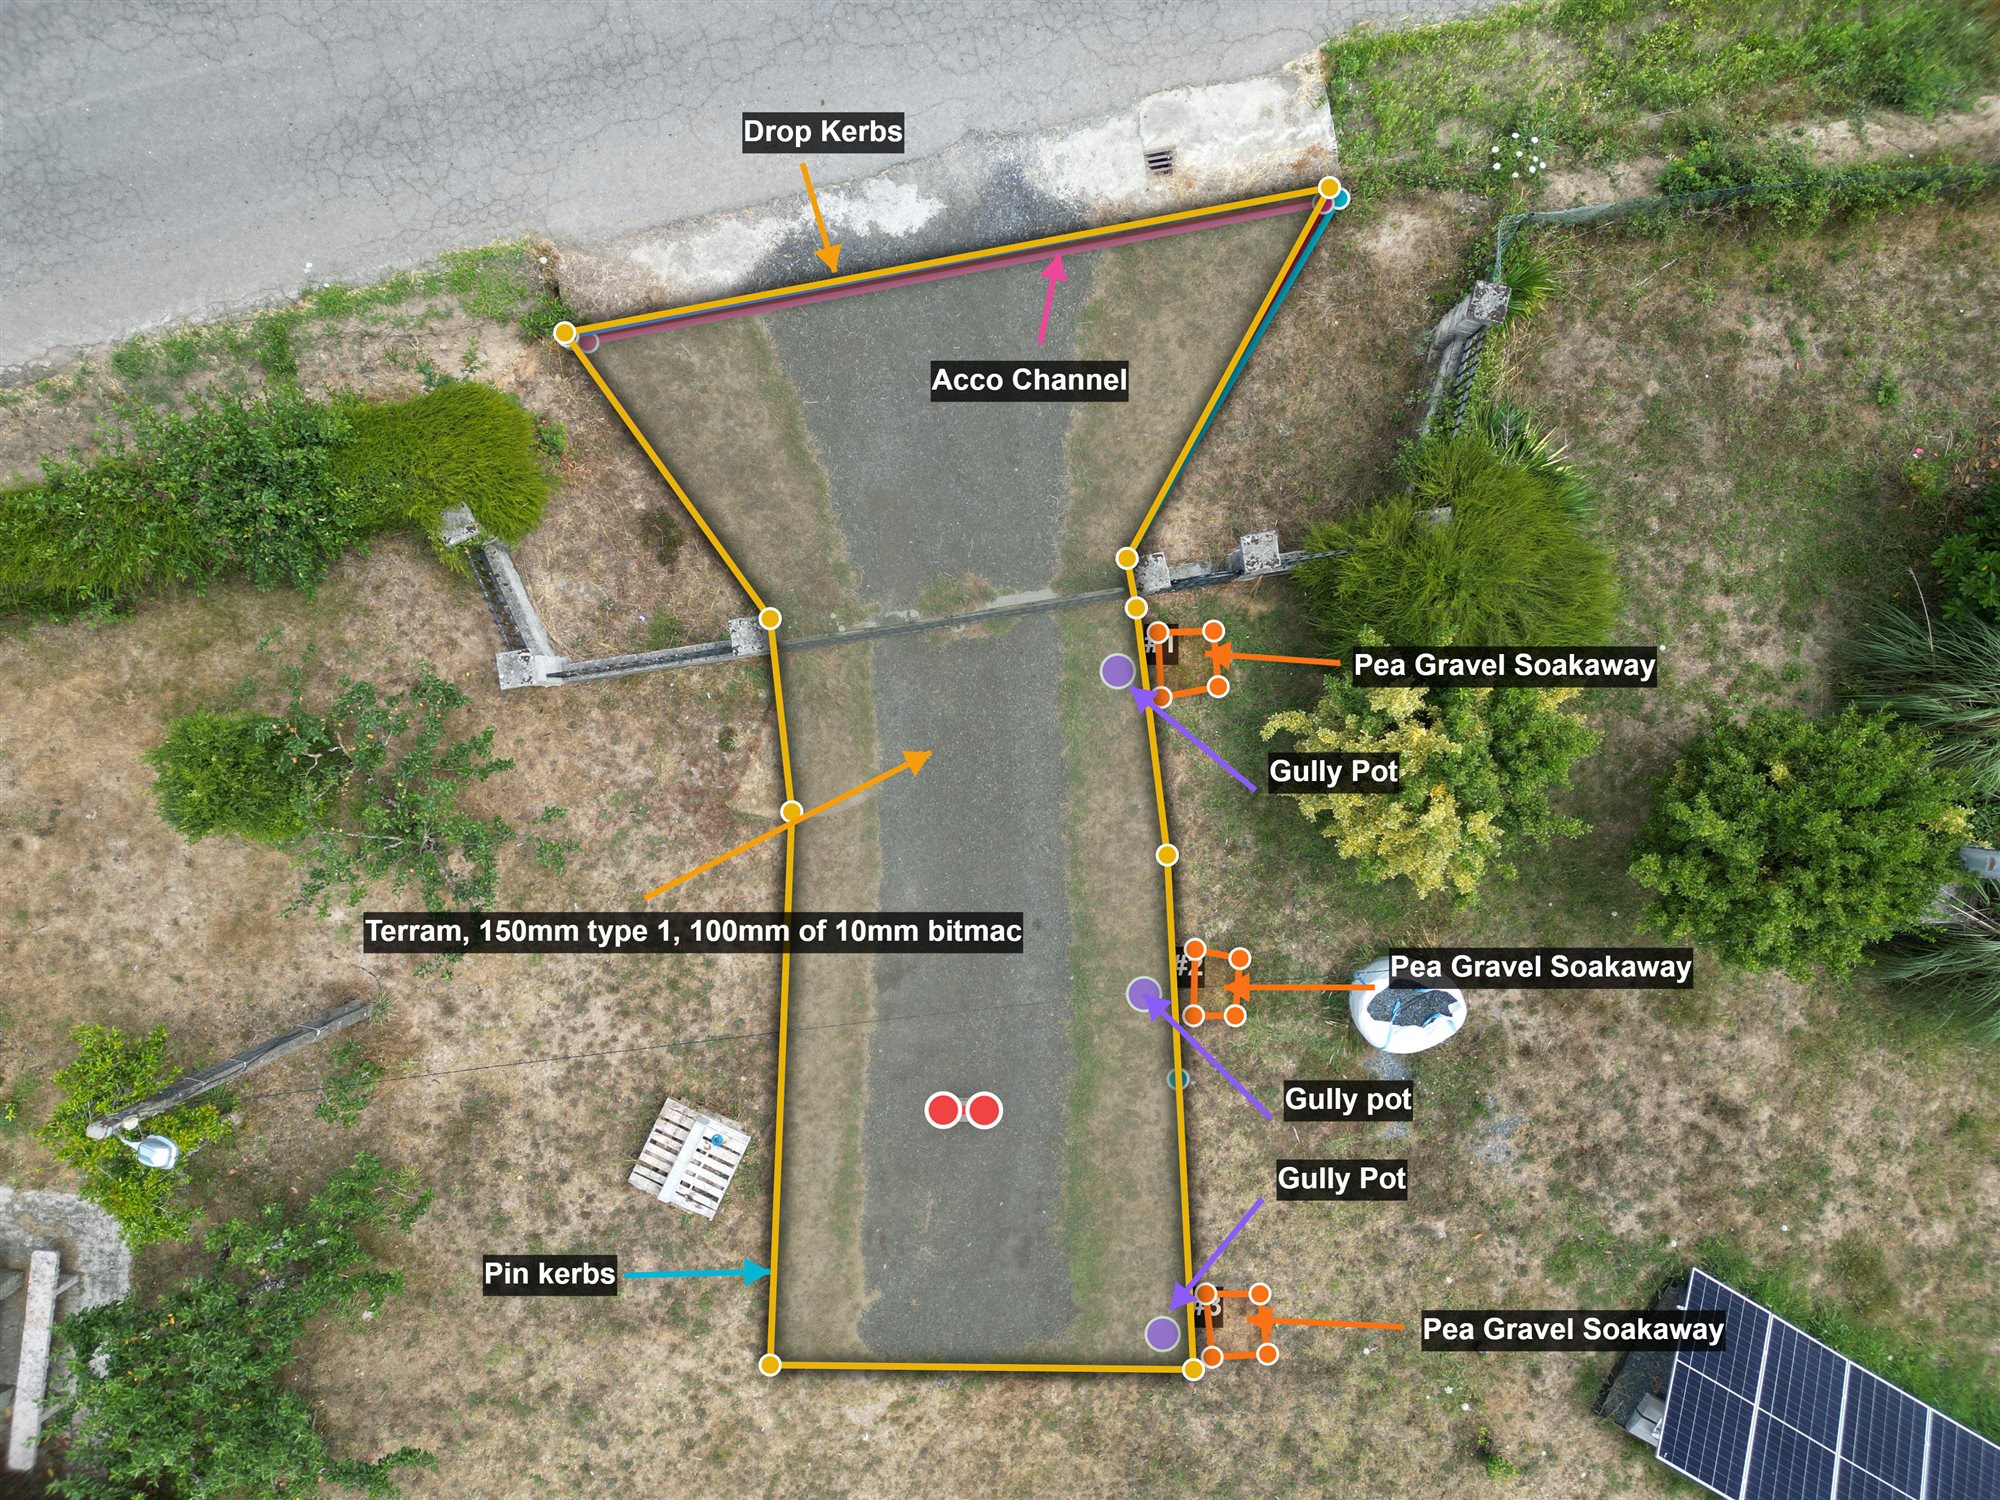
Here's what that looks like end to end, on an actual drone photo of a driveway and its drainage run — kerbs, an Acco channel, gully pots, soakaways and the excavation volume, all measured and colour-coded on the same photo:
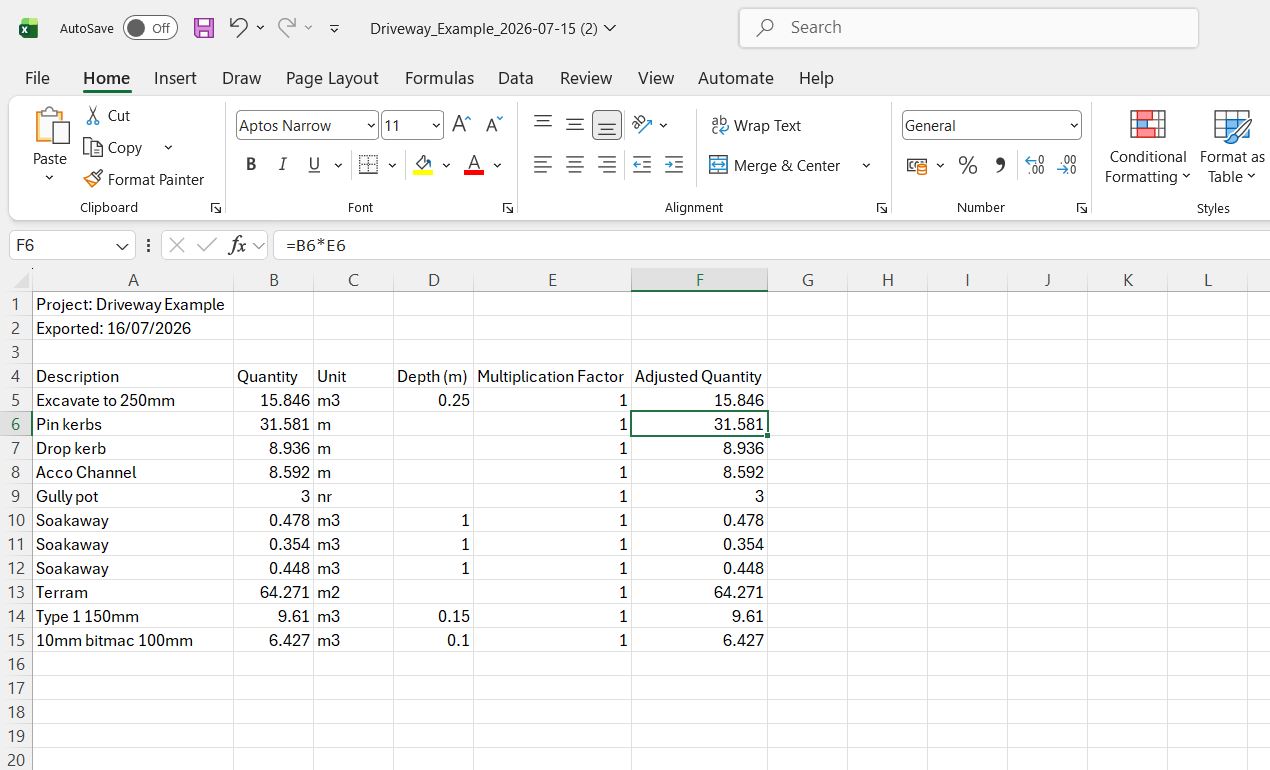
And the spreadsheet that comes out of it — every item, its quantity and unit, ready to drop into a quote:
Ready to try it on your own drawing? Open the takeoff tool — no account needed.